Configure Destiny Discover
Destiny Discover lets students and teachers access all of your print and digital resources in one place, from all types of devices.
The steps for setting up Destiny Discover depend on your install of Destiny:
| If your district's Destiny is... | Then... |
|---|---|
|
Follett Cloud®-hosted |
|
| Self-hosted |
Configure Destiny Discover
Before you begin:
Follett recommends customers have the technical staff who maintain the Destiny server configure Destiny Discover. To use Destiny Discover, you must ensure:
- Destiny is available on the web.
- Your district Destiny URL is configured.
- A valid port (80 or 443) is used.
- Only HTTPS connections will allow patron synchronization between Destiny and Destiny Discover.
To configure Destiny Discover:
- Log in as a Destiny Admin, and then select Setup > District Options.
Note: If you have a Consortium install of Destiny, you can perform these steps by logging in as a Super Admin, and then selecting Setup > Options.
- Next to Destiny Discover settings, click Edit.
- Type the Destiny Server External Address and the Port.
- Click Save.
After Destiny Discover is configured, permissions will be available and need to be reviewed.
Identify Your Destiny Server
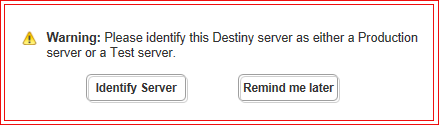
Since some schools set up test servers for Destiny, you will need to identify whether a Destiny server is a production server (available for students to access) or a test server. Also, the server must be open to the web and configured for Destiny Discover in Setup > District Options > Destiny Discover Settings.
|
Important: The Destiny Administrator needs to confirm that each site has a site customer number listed in Setup > Sites > Edit "Site Name". |
To identify whether your server is a production or test server:
- Log in to Destiny as a Destiny Administrator, and then do one of the following:
- If the server identification warning pop-up appears, click Identify Server.
Select District Options, and then click Edit next to Server Identity.
- If the server identification warning pop-up appears, click Identify Server.
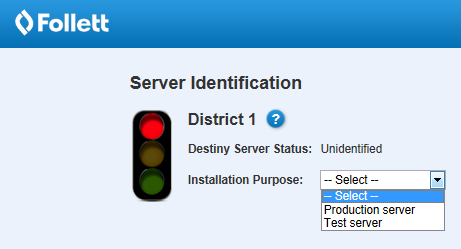
- Use the Installation Purpose drop-down to choose whether this is a production or a test server.
Note: If the district name or number is incorrect, click
 for more information.
 - Do one of the following:
If you selected... Then... Test server
You are finished until testing is complete. Click
 to close the pop-up. When you log in to Destiny, you will no longer receive the alert message to identify the server.
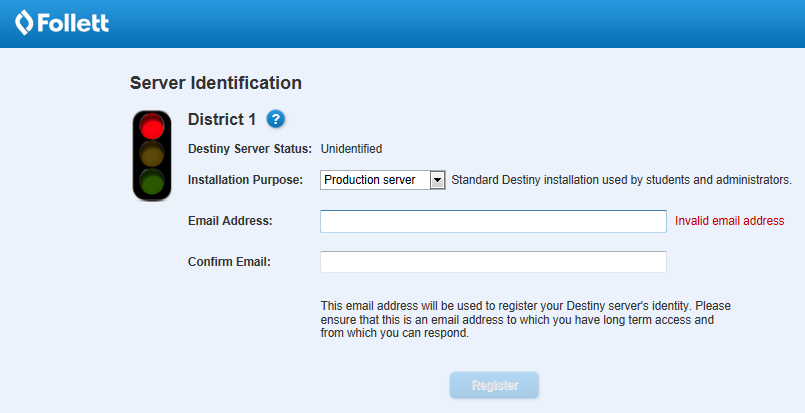
Production server - In the Server Identification pop-up, type and confirm your email address.
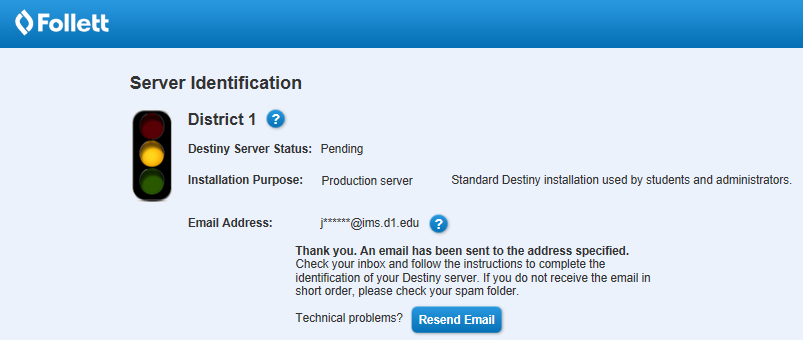
- Click Register. Destiny sends you a verification email.
Important:
- Once you designate it as a production server, you cannot change it back.
- For any specific district number, only one Destiny server can be the production server.
- Open the verification email, and then click Complete Identification. The Server Identification page designates your server as a production server.
- In the Server Identification pop-up, type and confirm your email address.
To change the identification of a test server to a production server:
|
Important: For any specific district customer number, only one Destiny server can be the production server. |
- Log in to Destiny as a Destiny Administrator, and then select Setup > District Options.
- Do one of the following:
- In the Server Identity section, if the server status is Unverified, click Destiny Discover Settings to first configure Destiny Discover.
- If the server status is Test, click Edit.
- From the Installation Purpose drop-down, select Production server.
- In the Server Identification pop-up, type and confirm your email address.
- Click Register. Destiny sends you a verification email.
- Open the verification email, and then click Complete Identification. The Server Identification page now designates your server as a production server.
Connect with the Follett Digital Platform
Once your production server has been identified, you can connect with the Follett Digital Platform.
(missing or bad snippet)Once your production server has been identified, you can connect with the digital platform.
For instructions, see Connect with the Follett Digital Platform.
Verify access level permissions
Follett recommends you check that the Destiny Discover access level permissions you want for your patrons are selected. Make sure to check permissions for all access levels, including unauthenticated guests, students and staff.
Notes:
|
Destiny Discover permissions include the following:
| Permission | Users with this permission can... | |
|---|---|---|
Search using Destiny Discover (enabled by default once Destiny Discover is configured) | Search the Destiny Discover interface from Destiny Classic (Catalog > Destiny Discover) or your Destiny Discover URL. | |
| Search all library sites through Destiny Discover
| Search all libraries in the Destiny installation, and view all search results in Destiny Discover. The copy availability in the search results lists includes copies in all schools in the district. | |
| Use Destiny Discover by default | Access Destiny Discover directly with your Destiny URL. | |
| Search curriculum tags | Use the Tag search option to find resources that support learning objectives assigned by Follett's curriculum experts. | |
| Search Open Educational Resources (OER) | View and open Open Educational Resources (OERs) in Destiny Discover. | |
| Use Biblionasium as: [Student or Staff] | Use a single sign-on to access Biblionasium from Destiny Discover, and have real-time information and access to library resources through Destiny Discover.
|
Note: Follett recommends a modern browser (such as Chrome, Firefox or Safari). For more information on system requirements, see Destiny System Requirements. |